After all parts were collected, and the neccisary preperations made, I started about 9:00 am Tuesday morning. The installation took a total of 43 hours. I could have done it in less,
but there were a few things that I did that added quite a bit of time to the swap. Oh well. About 6 of these hours was running around getting
more parts though.
Engine mounts welded in
Many hours were spent lining the engine and the transmission where I wanted. Don't know why this took so long, but id did. I wanted to make
sure I got the best fit. I did have to cut out a few more brackets that were left over from the solid axle swap. Having only a grinder the
job took awhile, especially in the hard to reach places, sometimes having to lift the body half a foot above the frame. I then cut holes in the floor for the shifters, and clamped the
engine and tranny mounts where I wanted them welded, and pulled the motor back out. Since I don't have a welder, I had a friend do my welding for me.
Only took about half hour to weld up all 4 mounts.
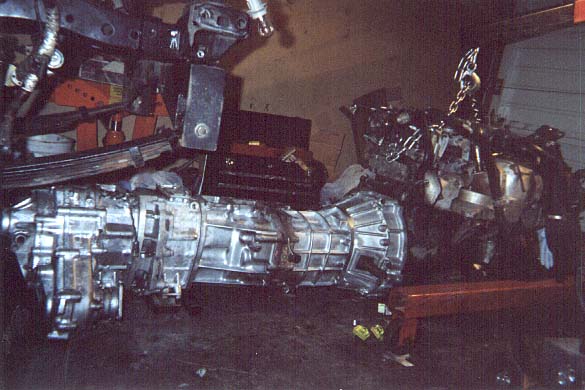
Tranny, and transfers, bolted to motor
Now for the point of no return for the install. By this time, I was 12 hours into the install and it was time to pull the motor from my car.
Since I have done this may times, pulling the motor from a Supra only takes me about an hour and 20 minutes. This was it, I can't go home until
the truck is done. So now that the motor is out, there are a few more things I have to do before bolting up the tranny. Last September
Scott Mech and I put this motor into an 85 Supra taken from his 90 Supra. The 85 supra never came with the 7M motor. There were a few changes
that had to be made to make it fit.
First we had to use a 5M oil pan, second we had to modify the oil pickup. So, I had to change back to a stock 7M pickup and 7M oil pan.
Next I spent some time bolting the transmission to the engine. Well, little problem here. My bellhousing was just a little too short, and the
input shaft would bind up in the crank. Well, I rumaged through my parts and found another metal spacer that goes behind the flyweel. This pushed
out the transmission just enough to keep it from binding. I used the same flywheel, clutch and pressure plate that was in the supra. This worked
great for the R151F transmission, even with the modifed bellhousing.
Now to squeeze the motor and tranny into the engine bay. This would be a lot easier with the tranny off the engine, but I just wanted to see.
I did get them both to fit, but it took quite a bit of persuasion. Next I mated up the two transfers, and rested the crossmember on the brackets.
Here I noticed my follie. I had put the engine back about a 1/2" too far. The EGR valve is too close to the firwall, and the intake hits the brake
booster. For now I will use an EGR blockoff plate, and shave a little off the intake. Looks like this will work, good snug fit.
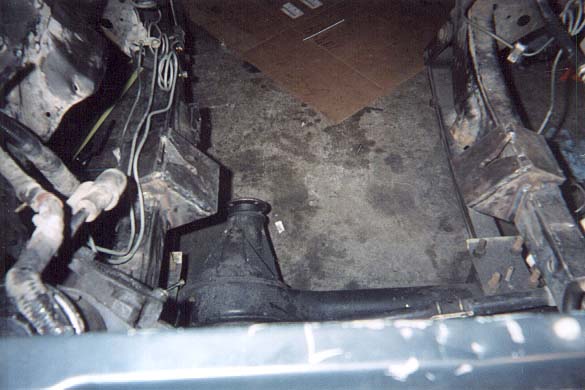
Under the truck after installed
I spend the next few hours repairing cut brake lines, and moving fuel lines to the drivers side frame rail. Lets just say the the Harbor Freight flaring tool sucks. I then procceded to weld up horseshoe crossmember, and noticed that I had cut it down a little too short. This will cause me a little
more greif and time, but nothing that can't be fixed. After speding some time getting crossmember welded up, I reinstalled gas tank with the Supra fuel pump inside.
Cooling was quite simple. I used the the stock V6 auto radiator which also provides oil cooling for the motor. Being that it was in the middle of the night, no auto stores were open, so for now I am using hoses and clamps from around my garage. All tempororay until I get a silcon hose kit, not the cleanest, but it works for now. Just a few more things to go. Fuel line to the fuel rail, clutch slave cylinder, driveline, downpipe, oil, and gear
shifters, oh, and for now I will use one of the electric fans from the 85 Supra that are acutally from an Eclipse.
Almost done!!! Last but not least, wiring. This was pretty simple. I did have to move the battery to the drivers side. The 7M air box, lands right
where the battery would be. I did have to cut the intake hose back just a little. Engine bay not quite long enough. The ECU fits nicely into the stock location.
I was worried that the harness would not be long enough, but plenty long. The ECU only needs a couple things to operate, constant power and
switched power. Then of course I hooked up oil pressure and temp guages, fuel pump and starter. I will work on a color coded diagram for this.
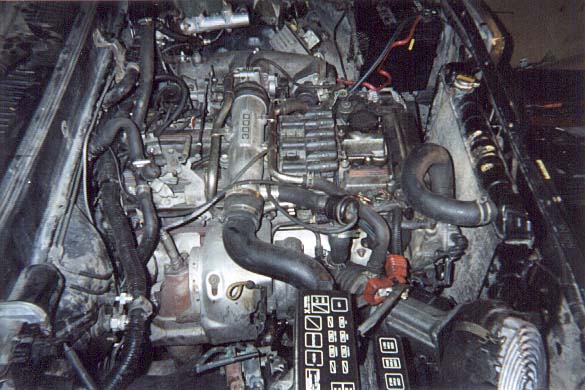
Side view of running motor
After checking everything, I give the key a turn, and motor starts right up. Now just have to put the interior back together and I can drive off. By
3:00am Thursday morning, I drove home. No exhaust yet, just a downpipe. I must say, what a difference. I have to drive about a mile up very steep
roads to my house, where before I had major difficulies, and had to use 1st gear in the auto, I could do in 3rd gear now with ease. I am very
mpressed.
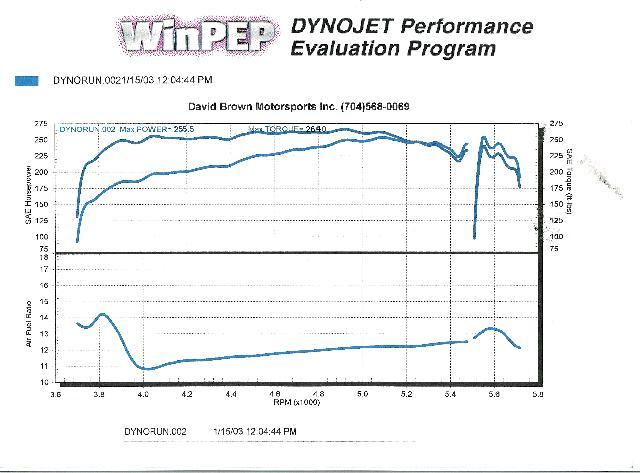
Here is a dynorun from January 2003. This is with a 60-1 upgraded CT-26 turbo running at 10 psi. Restrictive turbo elbow. Powerstroke intercooler with 3" intake piping and K&N Filter. Running this through R151F tranny and dual t-cases. 4.88 gears in the rear, and 38" tires. The motor I had in was losing compression, and I had a fuel problem. Started running to lean near the top. For some reason they guy on the controls didn't start the dyno until 3700 RPMS, and didn't even step on the gas until 3500. Very dissapointed on the way they ran the dyno. But it was still a pretty good run for stock fuel.