In the summer of 2003, Tobin's 4runner was hydro-locked, and threw a rod.
From here he had a few different options:
1. Find a core 22RE with a good block, and rebuild it
2. Buy a motor and replace it
3. Buy a motor and have a shop replace it
4. Sell the 4runner and buy another
5. Replace the motor with a 7MGE
6 Replace the motor with a 7MGTE
Not quite having all the skills yet to rebuild or replace a motor, he opt to have a shop do it. This would cost him $4300+. I told him just to sell the 4runner and buy another as that is about what they had paid for it.
He finally decided to do the 7MGE swap and have me do it for him.
The Swap
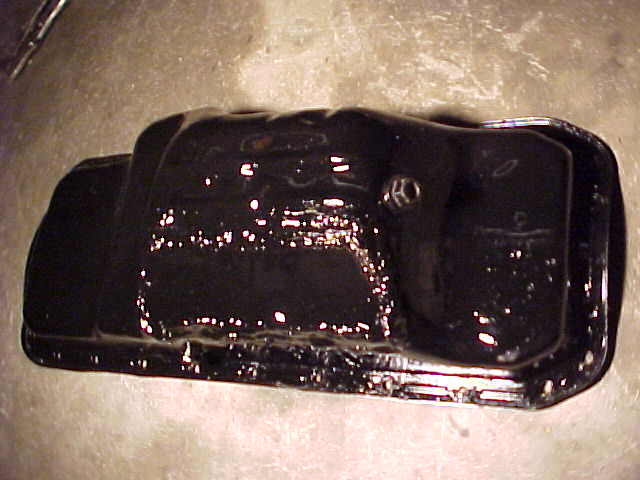
Oilpan
Problems with this swap was that it is still IFS, no body lift, and A/C is required. The 7M conversion is a little more difficult with these obsticles.
The first was the IFS and 4wd. The differential is in the way of the oil pan and oil pickup tube. In oder to keep funtional 4wd, a modification is required. This modification required cutting a section of the oil pan out and welding in a flat plate in it's place.
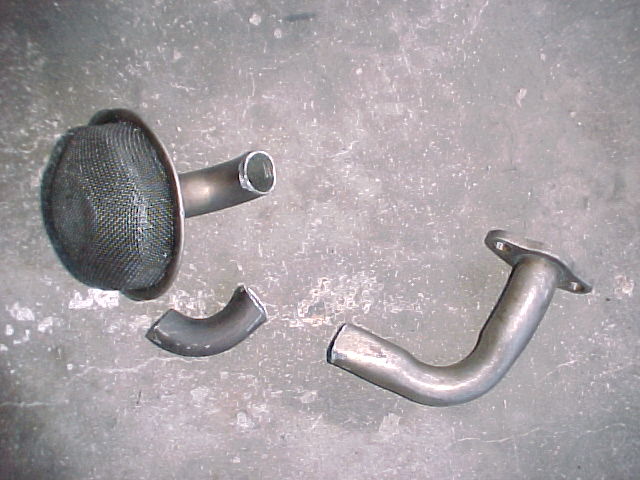
Pieces used for modded oil pickup
But now the oil pickup would not fit inside the oil pan, and it had to be relocated.
I thought about moving it to the rear of the motor, and create a deep sump like on the 22R.
There were two problems with that.
First you would no longer be able to run a crossover pipe for the exhaust.
Second, the pickup tube would be very long and heavy, and the support bracket for the pickup tube would no longer give proper support to the pickup tube. I may look into that in my next swap.
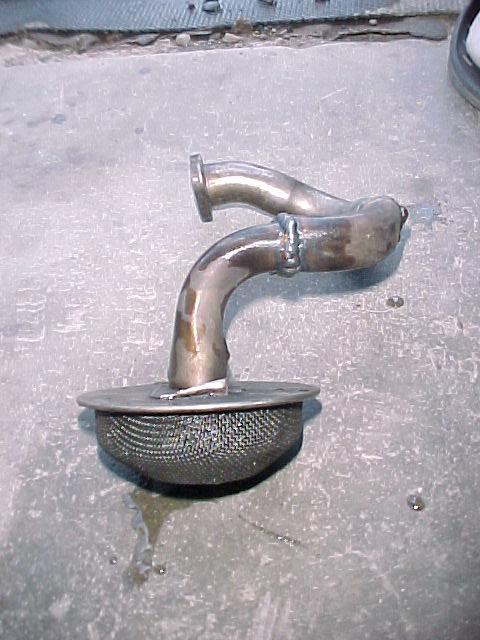
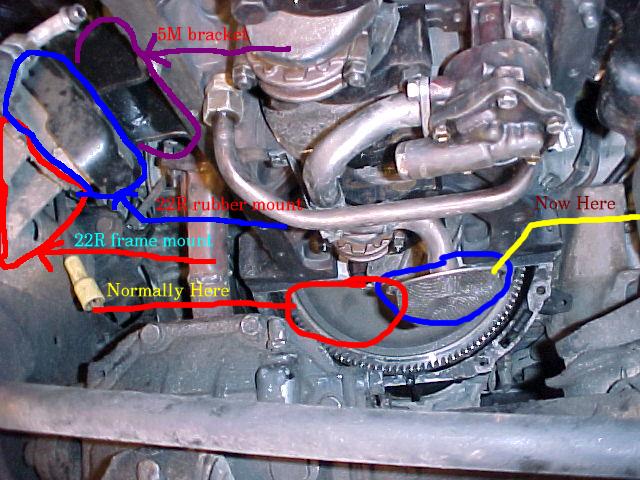
So I just moved the pickup tube a little closer to the drivers side of the motor.
Oil pickup
Under the motor oil pickup clearance
Using two oil pickups for the extra tubing to build one, I was able to relocate the pickup to clear the differential, and the redesigned oil pan. One downfall of this, is that we lost about 1/2 quart of oil capacity.
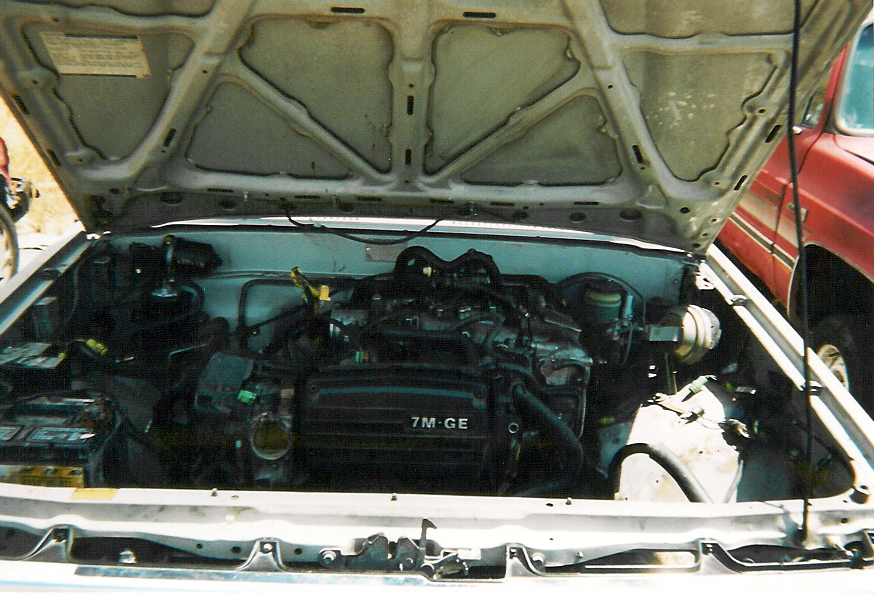
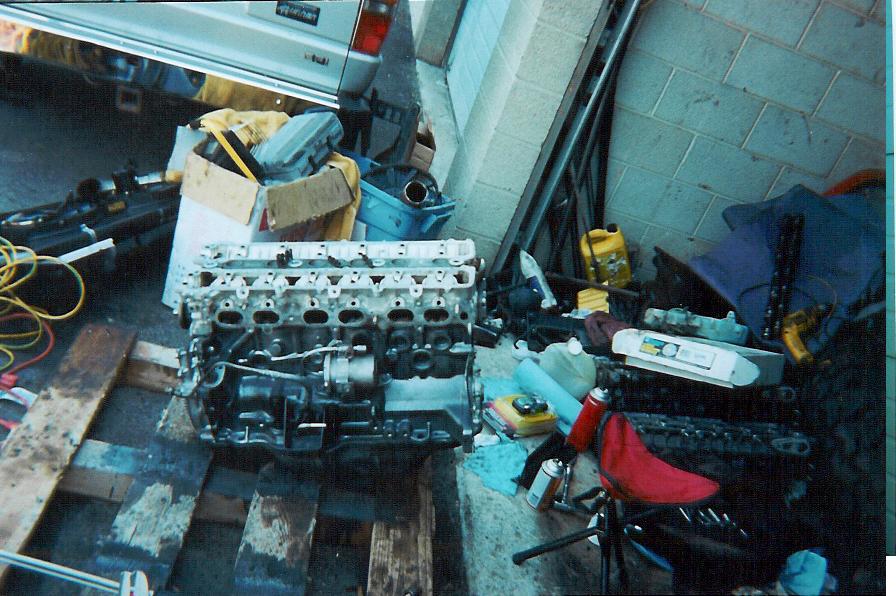
Here is a picture of the motor in the 4runner without the oil pan. Click the image to see the image with comments.
Once the motor was in, fuel lines needed to be ran from the passenger side to the drivers side.
This was done using fuel injection hose. I connected the hose to the steel line, and clamped it.
I then ran it across the firewall just above a lip located near the top of the firewall.
The line was then run down and connected to the steel line going into the fuel rail. The same thing was done with the fuel return line.
Then comes the radiator. I actually used a 22RE 3 core radiator for this conversion. I had the top inlet remounted from the passenger side to the drivers side. The design of this paticualar radiator did not allow the inlet to be put in the best location, but it is better than stock(for now).
The alternator was in the way of the inlet, so I had to relocate the radiator a couple inches towared the passenger side of the vehicle.
The lower front end support was removed to fit a 15" pusher fan, and still have room for the A/C condensor.
As of now, the condensor has not been put in, but eventually it will be.
So far, the cooling system is great. On hot days, the engine has not overheated, but a good long hard test up a long steep incline has not yet been performed. If it does overheat, nothing a 22RE aluminum radiator wouldn't solve.
Rebuild
MORE PROBLEMS - good or bad?
Well, things happend. He bought the motor, ECU, and harness from a friend, but the motor needed to be rebuilt. We rebuilt the motor, but NO. 6 cylider was a a little questionable.
Dropped the motor in, and it ran great, lots more power, but lots of blowby in No. 6. Block was no good, and oil pressure was too low.